

Online privacy has become a crucial concern amidst growing issues of data breaches, tracking, and targeted advertisements. Securely navigating online is increasingly challenging yet essential in preserving one’s privacy and ensuring a safe browsing experience. A proactive measure towards this goal is deploying network-wide ad-blocking and privacy-enhancing solutions like Pi-hole. This tool acts as a shield against unwanted ads and trackers, contributing to a cleaner, faster, and more private internet experience.
In this guide, we will go through the process of setting up Pi-hole on a Raspberry Pi to serve as a privacy-centric DNS resolver. While we are using a Raspberry Pi for this setup, the steps outlined should be similar on other platforms with only minor adjustments needed. It’s advisable to refer to the official documentation for any system-specific nuances that might arise during the setup. By following this walkthrough, you will be laying down the groundwork for a more private and ad-free online environment, regardless of the hardware you choose.
Installing Pi-hole
Kickstart the installation with a simple command:
1
curl -sSL https://install.pi-hole.net | bash
As the script runs, it performs initial checks before presenting the installer interface. 
A prompt about setting a Static IP appears, emphasizing its importance. Click Continue. 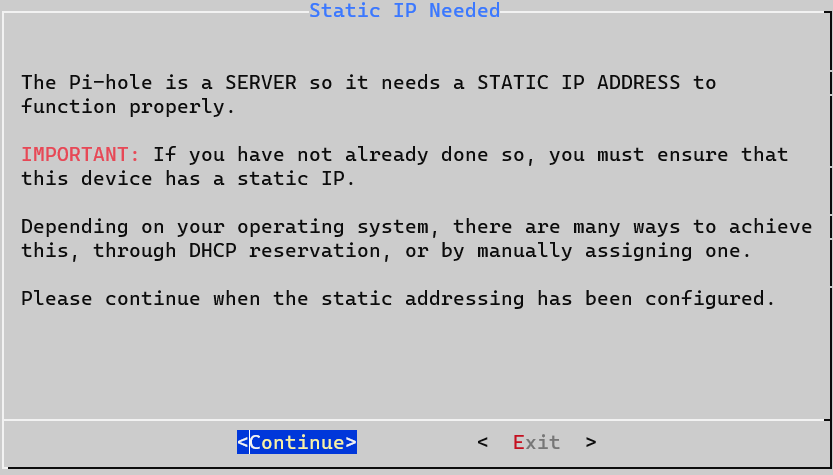
Choose your network interface; in my scenario, it’s a wired connection on eth0. 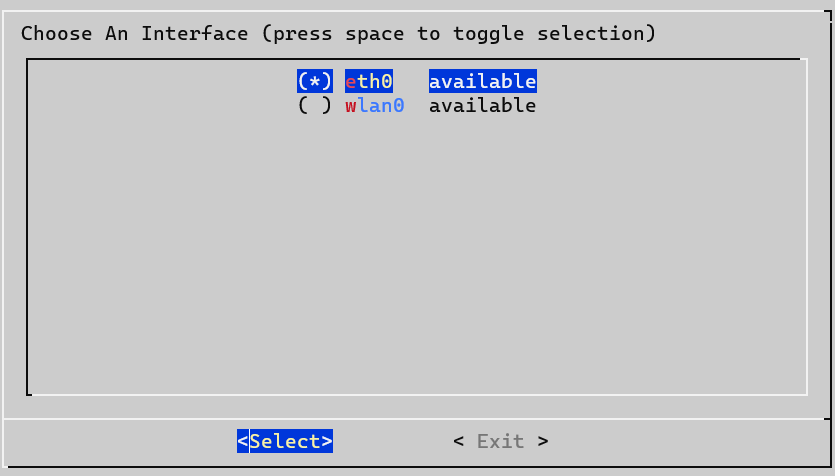
Select an upstream DNS provider. In this case, I opt for a custom provider. 
I am using 127.0.0.1#5335 as my custom DNS provider, which routes DNS queries through a local DNS resolver, ensuring better privacy and potentially faster responses. 
Confirm your settings and move to the next step. 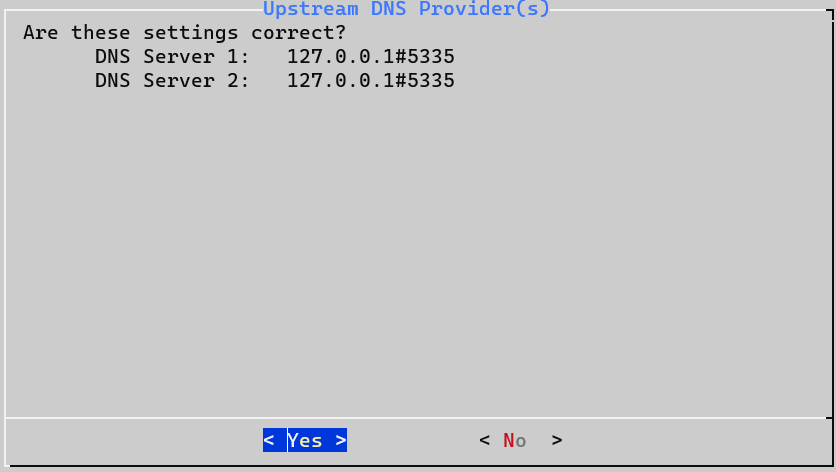
Opt to download the list of ad-serving domains to block ads. I select yes. 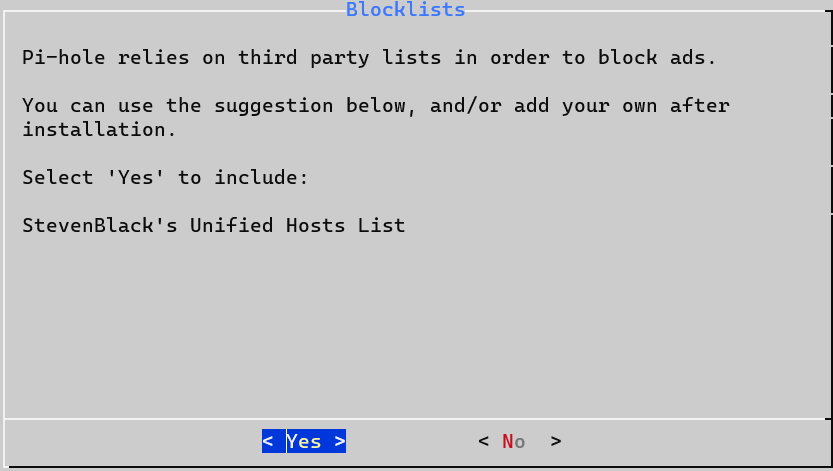
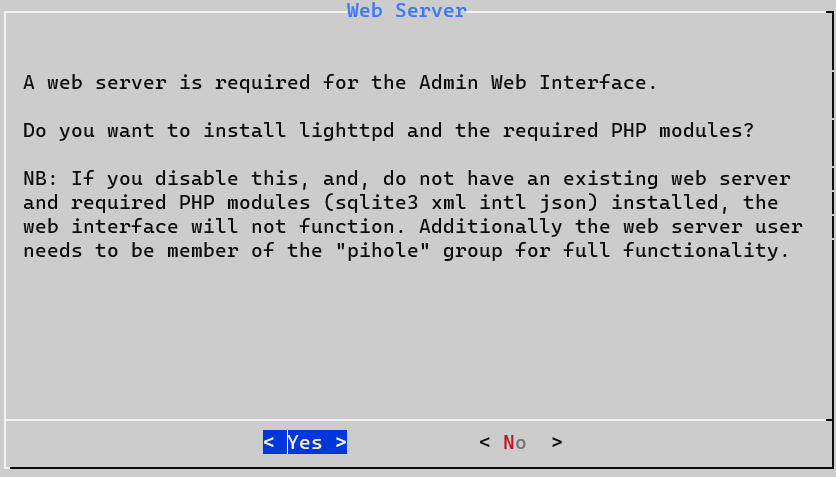
For the admin web interface, Pi-hole offers to install lighttpd and necessary PHP modules. I go ahead with this option. 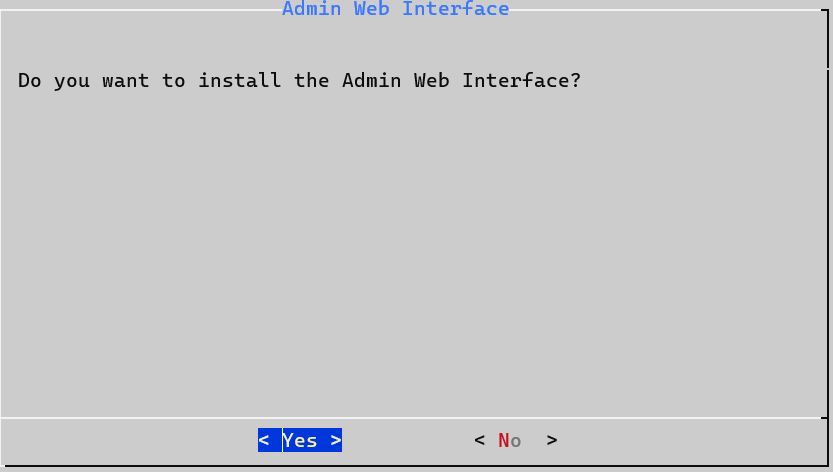
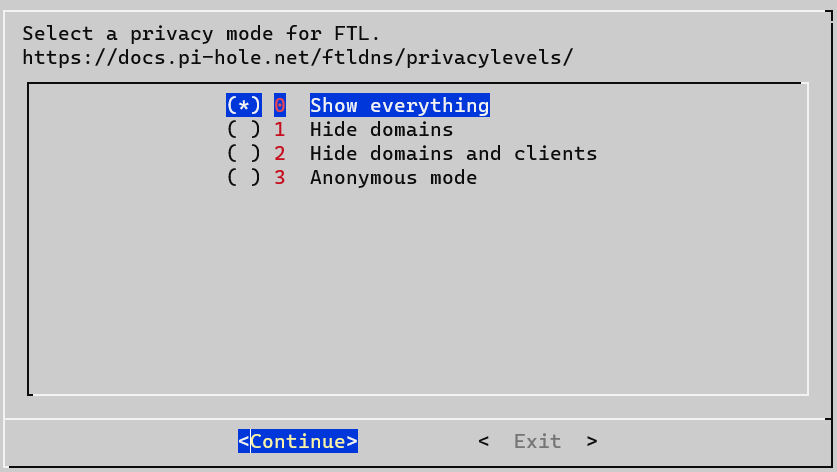
Query logging helps in troubleshooting and understanding the DNS queries in your network. I enable this feature and opt to show everything. 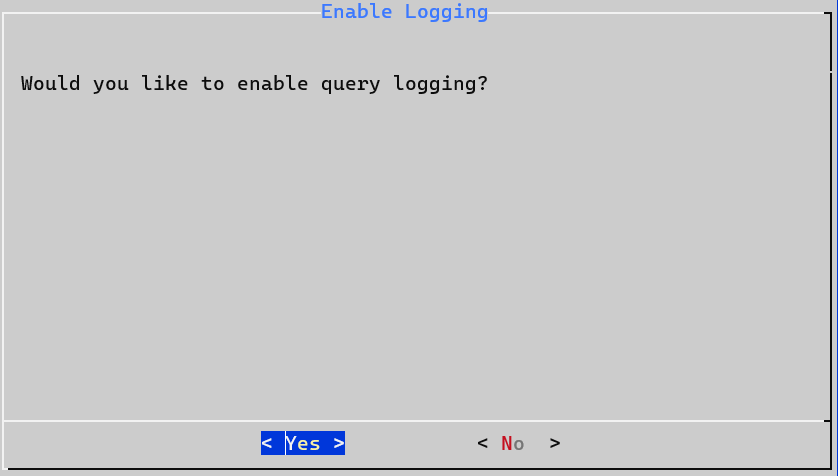
Upon completion, a confirmation with essential details appears. 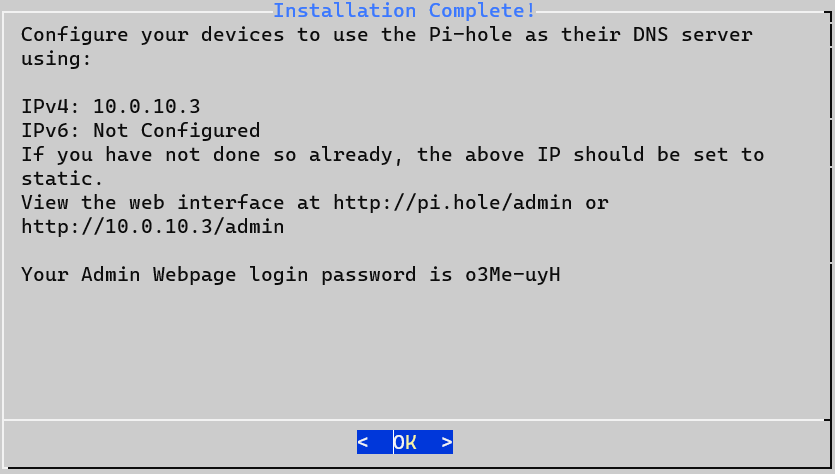
To change the auto-generated password, open the terminal on your Raspberry Pi and execute:
1
pihole -a -p
Follow the prompts to set a new password and confirm the change. 
Access the admin page via http://10.0.10.3/admin/, input your password, and log in to view the dashboard. 
Now, adjust the DNS settings on your router or devices to use Pi-hole. In my setup, I use a UniFi Dream Machine Special Edition—a high-performance router and switch. However, you might need to configure your ISP router or individual devices. The process is generally straightforward but varies with different equipment.
In my case, I navigate to Settings -> Internet on my UniFi Network, select my primary internet source, and under Advanced options, I switch to Manual DNS settings. I uncheck the DNS Server option to manually enter the Primary and Secondary Servers.
I use my Raspberry Pi static IP 10.0.10.3 for the Primary Server and Google’s DNS 8.8.8.8 as the Secondary Server due to its speed. 

After a few moments, traffic begins to flow through Pi-hole, reflecting in the dashboard. 
Pi-hole is not just an ad-blocker; it’s a versatile network tool that can serve as a DHCP server and a local DNS manager, among others. It broadens the scope of network management and privacy enhancement. Exploring the documentation reveals a range of features that allow you to adjust your network to meet your privacy needs and preferences. Your journey toward a more secure and personalized online experience has a reliable ally in Pi-hole.
Wrapping Up
Through this setup, we’ve laid down the groundwork for enhancing online privacy using Pi-hole on a Raspberry Pi. We’ve created a robust ad-blocker and set up a privacy-centric DNS resolver which serves as a solid foundation for a secure and ad-free digital experience. The capabilities of Pi-hole extend beyond just ad-blocking; it’s a versatile tool that can also function as a DHCP server and local DNS manager, among other features.
The journey through the digital realm is filled with challenges, yet with tools like Pi-hole, we empower ourselves to take control over our own online environment. Thank you for following along this guide. Here’s to further explorations in architecting our digital sky, equipped with better tools for a secure and private online experience.